Author Archive

Rode VideoMic Review

I purchased a Rode VideoMic about 2 months ago. I’ve used it multiple times, filming our youth choir recital, downhill skateboarding with high winds, and a few chunks of random dialogue. The audio from the Rode is significantly better than what comes straight out of my D3100, especially in windy situations.

Since My Nikon D3100 doesn’t have an Audio-In port, I have to use an external audio recorder to record the audio coming out of the Rode. This review won’t concentrate on how well the Rode works connected to DSLR’s, since I haven’t tested it with any cameras that have Audio-In ports. Other than that, using an external recorder or a DSLR makes no difference.

The clarity of the Rode compared to that of my on-camera mic is amazing. The signal-to-noise ratio is significantly higher, and the dynamic range is much better as well. When I was recording a choir recital, which had lots of loud sounds with lapses of quiet in between, my on-camera mic struggled to keep up. It would raise its sensitivity during quiet parts, and when loud noises came, they would clip. Even when it had adjusted, it still didn’t capture the full range that the Rode did. The Rode Videomic captures a much more natural, realistic sounding sound, especially when dealing with dialogue.

Even though the Rode easily outperforms my on-camera mic under average circumstances, the difference only gets more pronounced as audio-recording situations get worse. Bombing hills on a longboard with my on-camera mic produces nothing but a bunch of wind noise, while with the Rode with a DeadCat, there is still some wind noise, but it actually sounds like wind, rather than 10 787′s flying overhead. Without the Deadcat it works better than my on-board mic, but not that much better. If you’re filming in high winds, definitely get the Deadcat.

As far as disadvantages go, the Rode Videomic doesn’t have many. Its almost 10 inches long so it can get in the way, but as far as actually shooting goes, the mic stays out of my viewfinder even when I have my lens zoomed out to 18m. If you got any wider it would show up, but since I don’t have a lens wider than 18mm, that hasn’t been a problem yet.

Overall, the Rode is amazing. Its not cheap, but the difference it makes when recording audio is significant. If you’re interested in getting high-quality audio without a bunch of hassle with cables and mic poles, I’d highly recommend the Rode.
GoPro in the Snow

We’ve gotten over six inches of snow in the past few days, and we’ve played in it quite a lot. I took out GoPro out with us to document the action, and got enough footage to make a pretty decent 1 minute short. Enjoy!


BMX Track Preview

We’ve cobbled together ramps for bikes, scooters, and skateboards for as long as I can remember (much to the chagrin of our Mom!), and recently we’ve been building on an even bigger scale. I built a Mini-Mega Ramp for skateboarding, and this afternoon Luke and I began work on a BMX Track, incorporating the gap section of my mini-mega at the beginning of the track. We got it roughed out pretty quickly, and I took a run on it with our GoPro strapped to my helmet.
Eventually I want to make a better video of the course when its finished, and one while skating the mini-mega, too. Stay tuned!


This is why I longboard- Video

I’ve ridden a skateboard off and on since I was 9, and in the past 6 months I’ve taken up longboarding as well. Several guys that live in my neighborhood ride, and soon after I started riding with them, the subject of skate videos came up. I offered to shoot one, and, as they say, the rest is history.

This post is going to be more of a film-nerd approach to longboard filmmaking (and filmmaking as a whole) than a longboarder’s approach to breaking down the actual tricks performed in the video or the set-up used to perform them on, so if you were expecting the latter, turn back while you have the chance. You’ve been warned!

Of all the videos I’ve shot, this is the one I have the least cinematic reservations about. We had over 30 shooting-hours (3 times what we had on The Divisive Device, our longest movie ever!), so I was able to get a lot of footage. Since I got so much footage  I was able to be very picky as an editor, resulting in a tighter, better cut than most of our other movies. In post I made extensive use of the YouTube Video Editor’s ability to interpolate frames, allowing me to slow clips down 400%, great for the slow, dreamy look so common in action videos. There was a bit of aliasing around the edges of moving subjects, but the end result looks way better than showing the clip at 6fps.

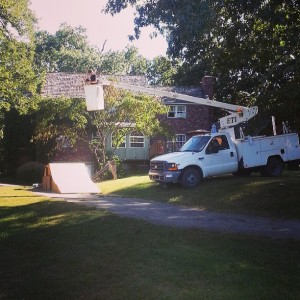
The camera rigs in this video were numerous.  I tested out all sorts of ideas I’d had in the past but hadn’t been able to execute, due to time constraints and laziness. I got moving shots with bikes, longboards, dirt bikes, and a homemade cable-cam, and, to mix things up, I was able to use a bucket truck to get a higher vantage point.

In the end, this video is kind of a “proof-of-concept”, so not all of the rigs and techniques I used worked perfectly, or were used to their full potential, but I’m looking forward to shooting a lot more videos- the stuff I learned shooting this video applies not only to longboard videos, but film as a whole!

Enjoy!


Davis & Sanford Provista 7518 Tripod Review

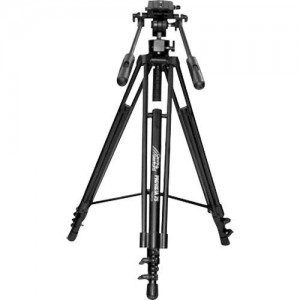
I purchased a Davis & Sanford Provista 7518 Tripod and FM18 Fluid head 4 months ago. I’ve used it a lot, taking it through 10 states and filming hours of footage with it, so I figured I’d do a review.

Pros:
The price is great. $200 isn’t cheap, but compared to $600 and up for a similar tripod from high-end manufacturers like Manfrotto, this tripod is a great price.
Build quality was very good. The tripod is almost entirely metal, making this tripod very sturdy and tough. I feel much more comfortable trusting my camera to this tripod than to some $25 plastic one.
The fluid head works very well. After years of working with $30 plastic tripods with flimsy pan heads, the fluid head is like heaven on earth. Smooth pans are so much easier, especially at low speeds, which would cause non-fluid heads to jerk rather than smoothly rotate.
I love the height of this tripod. Many tripods only reach up to 58 or 60 inches, even with the central pedestal raised. The 7518 can go all the way up to 64 inches, using only the legs (the 7518 lacks a central pedestal).
This is great, as every inch counts when you want your camera to be at eye-level.

Cons:
I said earlier this tripod is all metal. This is great for stability, but not so great for weight. The 7518 tips the scales at well over 10 pounds- not that huge, but every pound adds up when you’re hiking several miles to get to a location. Over half the weight comes from the fluid head, which, while great for videographers, is little more than a heavy, useless chunk of metal for still photographers. If all you plan to do is shoot stills, a lighter tripod with a ball head would probably be a better option.
The 7518 goes relatively high compared to many other tripods, but, because of the long leg sections and central spreader, the 7518 can’t go any lower than two feet. This stinks if you’re trying to do macro work or low POV shots with a tripod.
I mentioned earlier that the 7518 doesn’t have a central column. This can be a turn-off for some, but as a general rule its good, since you don’t have the temptation to destabilize your tripod by raising the non-existant center pedestal.
This tripod is meant for video, so it only has a 2-axis pan-and-tilt head, as opposed to many still tripods, which have 3-axis heads. If you want a tripod that can shoot portrait-oriented shots, look elsewhere.

Conclusion:
The 7518 with FM18 fluid head is a great tripod and head combo, for a great price. Its not perfect, but for the price its a very good option. Still photographers would probably be better served by a lighter, simpler tripod, but for video with some stills thrown in, this tripod is great.


We have a winner!

I’ve spent the last few days at the FilmFest 4-H in Branson. I’ll address everything that went on in more detail in a later post, but for now, I’ll just leave you with the film that won second place in the animation category: The Great Car Chase!


24,249 Shutter Actuations

Exactly 365 days ago, I bought my D3100. Since then I’ve taken 24,249 pictures with it. When I looked it up last night in the EXIF data instead of pictures, it said shutter actuations. I like that.

Anybody can make their shutter actuate, but that doesn’t mean anyone can make great pictures.

Out of all the pictures I’ve taken this year, less than 100 were what I’d really call good. That doesn’t sound like a lot, but I’m happy. Last year I had no idea what an F/stop was, how to set your ISO, or how to shoot pictures on anything but Auto Mode, and now I never use Auto Mode.

I’m looking forward to learning even more this year, and looking back over my second year of serious photography!


Chicken Fun

We filmed this last summer, but I didn’t get around to editing and posting it until recently.

Enjoy!


Southwest Trip 2013

We were recently blessed to go out west for two weeks. We visited the Grand Canyon, the Petrified Forest, Zion, Bryce Canyon, Arches, Pike’s Peak, and too many other places to count. I filmed over 8 hourse of footage with my D3100 and the GoPro, but I’ll share that later, after I edit it. For now, here are 76 of the 2600 pictures I took while on the trip.

Enjoy!

Southwest Trip Pictures


GoPro Demo Reel

We got a GoPro about 6 months ago, to film our vacation to Florida. We got lots of awesome shots, and have gotten lots since then, putting the GoPro in the sink, oven, refrigerator, and too many other odd places to count. I sifted through all the footage we shot (almost 20 hours worth!), and ended up with a “best of” reel that was just over one minute long.

Enjoy!


What Really Happens When Mom and Dad Leave

Our Mom and Dad generally go on a date every Friday. While they were gone last Friday, we filmed a movie about what “really” happens while they’re gone.
When they left yesterday, we texted them the link while they were out.

I hope you enjoy it as much as we enjoyed making it, and our parents enjoyed watching it!

P.S. If you’re wondering why Luke isn’t in the movie, the answer is simple. He is too upstanding to lie, and too scared of Rachel to tell the truth.


The Divisive Device

We joined 4-H last year, and when I heard about the 4-H FilmFest, I thought it would be a great idea to enter a movie in it. Rachel and I brainstormed, and wrote a script in about 3 days, and then we went on to filming.

This movie was far and away the hardest movie we’ve ever filmed. It was twice as long as any movie we’d ever made before, which meant we had to shoot a lot more footage (final tally: 49 minutes), and since we didn’t have a tripod it was hard to get steady shots. We had to arrange boxes, books, bins, and camera bags to substitute for a tripod.

The shot in the cave was especially hard. Trying to keep my camera from getting wet and ourselves from getting tremendously muddy and bruised took a ton of effort, and then to add acting and filming just pushed it over the top. We were exhausted by the time we got back home, but we got the shots we needed. In the end, thats all the viewers care about!


Text in Blender 2.66a

I was a bit stumped by the Text editor in Blender. It didn’t use any of the keyboard shortcuts that normal word processors use, and I couldn’t figure out how to change the text from saying “text” to saying what I wanted it to. I finally did, but I figured I could save some other people some trouble by posting a tutorial on how to do it.

I hope you learn something!


The Great Car Chase

I’ve always liked stop-motion animations, but I was never able to really pull one off. The closest I ever got was The Lego Party, which only had a few seconds of Stop-motion animation in it. I decided to try again, and my animation actually turned out pretty well!

With my D3100, stop-motion animation was a lot easier, partly due to its superior technical qualities, but mainly because its just so big! I could set it on the floor where I needed it to be, and it wouldn’t tip over or move at the slightest bump. I used my battery grip as a kind of remote shutter release to help even more. Instead of screwing it into the bottom of the camera, I set it beside my D3100 and plugged the release into the GPS port.

I shot all of this animation in Manual mode. I tried Auto mode, but it wouldn’t give mme enough depth-of-field or consistency. None of the shots in this movie were at an aperture less than F/10, and most were at F/22 or over, some even up to F/36, the highest my 18-55mm will go. If I had set the aperture any lower at such close distances, I would have had less than a centimeter of the scene in the focus plane at times!

I only used natural lighting for this movie, and set the white balance to Cloudy. I had to move my sets around as the day went on, to avoid harsh shadows, but overall it worked out well!


Modeling a Pencil in Blender 2.65a

When I first started using Blender, I watched lots of tuotrials on the basics of Blender- how texturing, modelling, and lighting worked- but there were very few tutorials on modelling actual objects that were aimed at beginners. All the tutorials I found were aimed at people with prior experience in Blender, experience that I didn’t have at the time.

Fast-forwarding 3 years or so, I now have more Blender experience, but I know there’s always new guys coming into the Blender scene, so I figured I’d make this tutorial. In this tutorial I try to explain everything so that anybody, whether or not they have Blender experience, can model a pencil.

I hope you learn a lot!


31 Semis make a great bridge

I’ve been playing around with Phun some more, and I made this. It took a while to get the truck-to-gap ratio just right, but in the end, it worked well! I just don’t think this bridge construction method has wide-spread adoption potential. *sigh*


Phun Stuff

Many years ago, when dinosaurs roamed the earth and I wasn’t making movies, my dad introduced me to a very interesting piece of software: Phun.

Phun was the first “real” piece of software I’d ever really used, and I spent many happy hours experimenting with it back when I was young(er). Blender came along, and I used that a lot more, but recently I went back to Phun and made a few physics simulations that I thought I would show you.

Phun has less features than Blender, but that is, for the most part, a good thing. John and Isaac can easily build things on Phun, without having to watch hours of tutorials and memorize reams of keyboard shortcuts.

Phun has no built in video export, but that was easily overcome with Quicktime screen capture software. All of the clips you see in this movie are run at what would have been real time if I wasn’t screen recording at the same time. The screen capturing hogs a lot of processor power, so there were times when I had to speed up the simulations that involved water.

Enjoy!


How to Solve a Triangle Puzzle- Blindfolded!

Some of the best VFX are the simple ones, the ones that trick your brain because it has never seen something like it in the “real world” before, so your brain interprets what it sees on-screen as something way more complex than what actually is going on. This trick is like that.

All we did was reverse the footage we shot, but it works quite effectively.

The only giveaway to this trick are the reversed sounds, which are opposite of real life- they fade up to a sharp ending rather than having a sharp beginning that fades out to nothingness. You could probably spend several hours flipping the sounds and matching them back to the movements they came from, but that would destroy some of the fun and usefulness of this quick-and-dirty effect.


Dry Ice Cream

Our dad checked a book called Mad Science out from our library last week. It was written by Theodore Gray, the author of the Gray Matter column in Popular Science magazine. All of the experiments in the book were cool, but most involved high heat (as in well over 1,000 degrees) or toxic chemicals like Mercury or Chlorine Gas. As these experiments were a little bit beyond our league at the moment, I looked for some experiments that wouldn’t kill, maim, or seriously injure us if they went wrong. We found the perfect one: Dry Ice Cream.

We’ve used dry ice before and we figured that this experiment would be perfect, because, as Luke said “it combines two of my favorite things, science and food.”

It was surprisingly easy to make this ice cream, and it tasted very good (although it had a slightly carbonated taste from the Dry Ice). The ice cream was extremely creamy, since no ice crystals had time to form in the 2-3 minutes it took for our ice cream to completely set up.

Everyone in our family was very impressed with the dry ice cream, and wanted more. Maybe we could do liquid nitrogen ice cream next time…..


Building a 7 Foot Snowman in 45 Seconds

It has snowed several times in the past few weeks, and I’ve gotten a lot of good GoPro footage while we played in the snow.

We’ve found that the most effective way of getting good shots is to just keep the GoPro running for long periods of time. In the past week, I’ve taken the GoPro outside twice, and have gotten over 100 minutes of footage!

One technique that works very well is to set the GoPro down on something solid and let it film for several minutes. I then go into iMovie and speed the footage up 20 times, and you get a clip of time-lapse footage. I’ve gotten some great results, and I thought I’d share one of them with you. Enjoy!


Experiment!

We had a class at our church that taught us about emergency preparedness. It was getting dark outside, and my D3100 wanted to set a much longer shutter speed than I wanted. I decided to switch to manual mode to get the settings the way I wanted them. Even in Manual mode, its amazing to see the difference between the two shots below:

There’s no difference in the ISO, shutter speed, or aperture. These pictures were taken within a second of each other. So what made the drastic difference?

I had my D3100′s White Balance set to Auto. In the interval between these shots it resampled what white “should” be, and corrected, resulting in the change. I realized this, and set it to Manual so my pictures would all turn out the same.

Auto mode is meant to crank out good pictures, without the person pushing the shutter having to think. It works well most of the time, but it can never know what you truly want. If you want an ultra-high shutter speed to capture a breaking lightbulb, it doesn’t know that- your camera will set a speed between 1/125 and 1/15 and take a picture of the blurred bulb. If you want to take a silky picture of a waterfall, you camera doesn’t know that- it’ll use that same 1/15 shutter speed and create a boring picture of frozen-looking water.

The big advantage of DSLR’s is that they let you have complete control of the picture you take. You can do anything you want. Knowing what you want becomes the biggest issue.

Experiment! The more you goof with your camera’s settings, the more you’ll know what you want.


HFR 3D

I recently went to see “The Hobbit: An Unexpected Journey” in HFR 3D. It was very enjoyable, but not so much so that I would never watch a movie in anything but HFR 3D. (If I did say that, I’d be out of luck- “The Hobbit” is the only HFR 3D movie out there!)

Some people (especially film critics) didn’t like HFR, but that doesn’t mean that HFR is DOA. When sound movies came out some people didn’t like them. When color movies came out some people didn’t like them either.
I don’t really know of any movie that really benefits greatly from color, or even sound for that matter. Color and sound are just things that make movies more enjoyable to watch.

You might argue and say that sound is essential. It isn’t. Directors for  the first 30+ years got along fine without it, and didn’t think they were missing out on anything. The style of film now requires it, but that’s because people have exploited the benefits of sound. The same goes for color. It’s great to have- I don’t think “The Avengers” in B&W would have the same “coolness factor”- but it’s not essential.

“The Hobbit” is the first movie ever shot in HFR 3D, so I have no idea how HFR 3D as a film technique will eventually pan out. I personally thought that some HFR shots made parts of “The Hobbit” worse, since it made lighting errors more obvious, but the first movies in color weren’t that great either, so it’s hard to tell where 3D will go.  It’s either going to be a fad, or it’ll eventually be just like sound and color- normal.

You don’t here of anyone saying their movie is “in technicolor” anymore because its understood that all movies released today will be color. We’ll know that 3D is here to stay when its no longer advertised and hyped as “3D!”.


D3100 Battery Grip Review

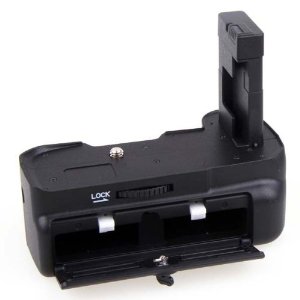
I recently ordered a Neewer Professional Vertical Battery Grip so I could double the battery life of my D3100. It was so cheap ($25) that I didn’t expect too much, but I was pleasantly surprised by it.

The grip is definitely not quite Nikon quality, but if it was by Nikon they would be charging a ton more than $25 for it. The official Nikon EN-EL14 battery I bought to go with this grip cost $40- almost twice as much as this grip! (You can get after-market batteries for much, much less, but they don’t have a Nikon chip in them. Nikon only lets you use these batteries if you first put in the EN-EL14 that came with your camera, turn your camera on, and then put in the after-market battery. To me it was worth the extra money to get a real Nikon product rather than a no-name cheapy battery.) This grip was very, very good for its price.

Pros:
I love how this grip makes my camera feel! My pinky finger would always hang off the bottom of the D3100′s grip, but with the battery grip attached, my camera feels much more comfortable to hold. Even if the grip didn’t double my battery life I think it would be worth buying for ergonomics alone. Just like holding a D3100 is much more comfortable than holding a point-and-shoot camera, attaching this grip to your camera greatly increases comfort as well.

I was expecting the grip to add to the camera’s weight, but it really didn’t. The grip was almost too light actually, compared to the D3100 body!  The grip with an extra EN-El14 battery in it weighs 202 grams, which isn’t really that much, since my D3100 with a battery and a 18-55mm VR lens weigh 829 grams. The fact that the grip is so light might turn some people away, since it doesn’t quite have the same “feel” as the D3100 body, but to me it wasn’t that big of a deal. When you go on a hike you appreciate every little bit of weight that you don’t have to carry!

Cons:
The only thing that I don’t like about this grip is the cable that runs from the grip to the GPS port. Since Nikon didn’t create a grip connection port in the D3100, there’s no way that the grip can communicate with the camera. It’s not that big of a deal. I keep the cable plugged in when I take pictures around the house, and unplug the cable to keep dust out of my camera when I go on a hike. When you want to tip your camera on it’s side the grip’s shutter release button really comes in handy, so you don’t have to reach one of your hands up at a weird angle to release the shutter. If they had figured out some way to replace the cable with a wireless release, I would have definitely rated this grip as a 5 star product. As is, I would still give it 4 stars.

Well that’s my thoughts on it! This battery grip won’t help you take better pictures, but it will let you take more of them, and will make taking them more pleasant ergonomically.
This grip is an excellent buy!


A few pictures…

I bought a Nikon D3100 back in July, and have been very impressed with its handling and abilities. I’ve taken several thousand pictures so far, and thought I’d post three of my better ones. I have quite a few like these, but I’ll save those for my $200 2 inch thick coffee table book. Enjoy!

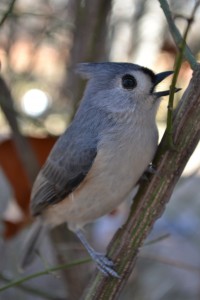
This bird hit one of our picture windows, and as it recovered on the nearby branch of a burning bush, I snapped some pictures of it. Even though I only used my 18-55mm VR kit lens,  I was able to get close enough to get this nearly frame-filling shot, since the bird “played dead” rather than flying from me. As soon as I moved, the bird flew away, unfazed.

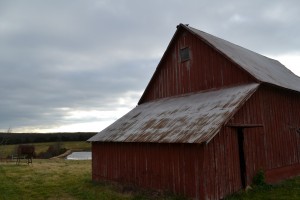
We went to our grandparents house for Thanksgiving, and right next door was this neat looking old barn. I walked over, leaned across the barbed wire fence, and snapped a few shots. This one is my favorite. The framing turned out the best of all those I shot, and I was able to get a good chunk of sky into the shot as well.  A storm was going by about 10 miles away, so I got some interesting cloud coverage as a backdrop for the barn.

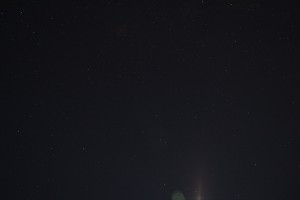
I took this picture while sitting on the roof of our van, to keep stray light from street lights from getting into my lens. I still got some light from the moon, but it created a cool ghosting effect that I actually like, rather than washing out the entire picture. To take this picture I put my camera on a tripod, set the shutter for the longest available (30 sec on my D3100, unless you count Bulb), set a 10 second timer, and jumped off the roof of our van while the timer counted down to prevent camera shake during the exposure. The thing that looks like a shooting star on the right isn’t- its a plane. It still looks cool though!


The Solar System

I haven’t made a Blender animation in a long time, and I figured I should start making some more before I got too rusty. Modelling the planets wasn’t very hard- I downloaded the  textures of the planets from Nasa.gov, and the planets were just spheres that I shrunk or expanded to scale. I ran into a few minor difficulties making Saturn’s rings and the sun, but all in all this animation took about an hour and a half to create, and about the same time to render.

The heavens declare the glory of God!


Copyright © 1996-2010 SixSibs. All rights reserved.
Jarrah theme by Templates Next | Powered by WordPress